If you want to redesign an already existing website in WordPress without taking the old website offline, you can create a development website in a separate folder on the server and migrate it later to the main url. Of course, you can also create a development environment locally on your own PC. But I like being able to test out the new site on different computers and different browsers.
[alert heading=”Step 1 | Create the Development Site” type=”alert-info” block=”true” close=”false”]Create a sub directory in the root directory of your website on the server called /wordpress.[/alert]
[alert heading=”Step 2 | Now Start Developing Your New WordPress Site” type=”alert-info” block=”true” close=”false”]Create the new WordPress site in the new subdirectory (directions for this to come later).[/alert]
How to migrate the new site when you are ready to launch:
[alert heading=”Step 1 | Make a Back-up of Your Development Files” type=”alert-info” block=”true” close=”false”]
Make a local copy of the development wordpress site files (I copied the files to my desktop).
Use FTP to transfer the files to a folder you have set up on your desktop or somewhere else on your computer. This takes a while so you can do Step 2 while you are waiting.
[/alert]
[alert heading=”Step 2 | Make a Back-Up of your Database” type=”alert-info” block=”true” close=”false”]
Back-up your current WordPress database
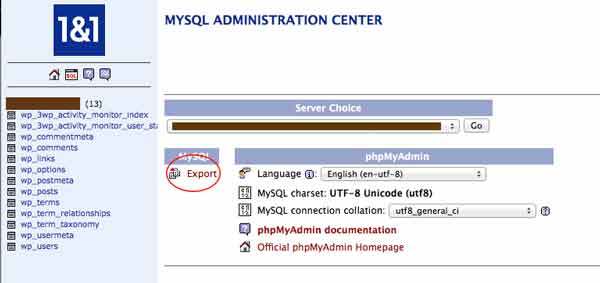
Use phpMyAdmin to export your database. (On the 1 & 1 dashboard choose “MySQL administration”)
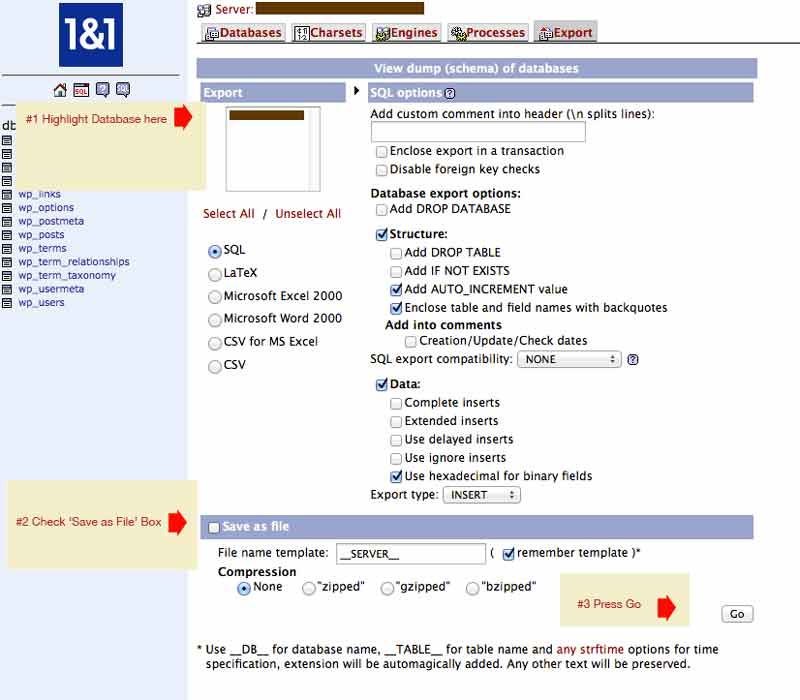
Choose ‘export’ under the My SQL heading.
On the next screen highlight the database numbers, check the box ‘save to file’, Then press ‘go’.

The SQL file will be downloaded to your download folder on your local PC, copy or move it to a safe place.
[/alert]
[alert heading=”Step 3 | Archive your old site’s files” type=”alert-info” block=”true” close=”false”]
Make a folder called oldsite in the root directory of your site. Copy the old site files to the oldsite folder. Then copy the files you backed-up in Step #1 to your home computer to the root directory of your site.
[/alert]
[alert heading=”Step 4 | Apply Database Migration Fix” type=”alert-info” block=”true” close=”false”]
Go to phpMyAdmin on your server. Select your database. Then select SQL. (Under the 1&1 logo you will see an icon with SQL in it next to the home icon.)
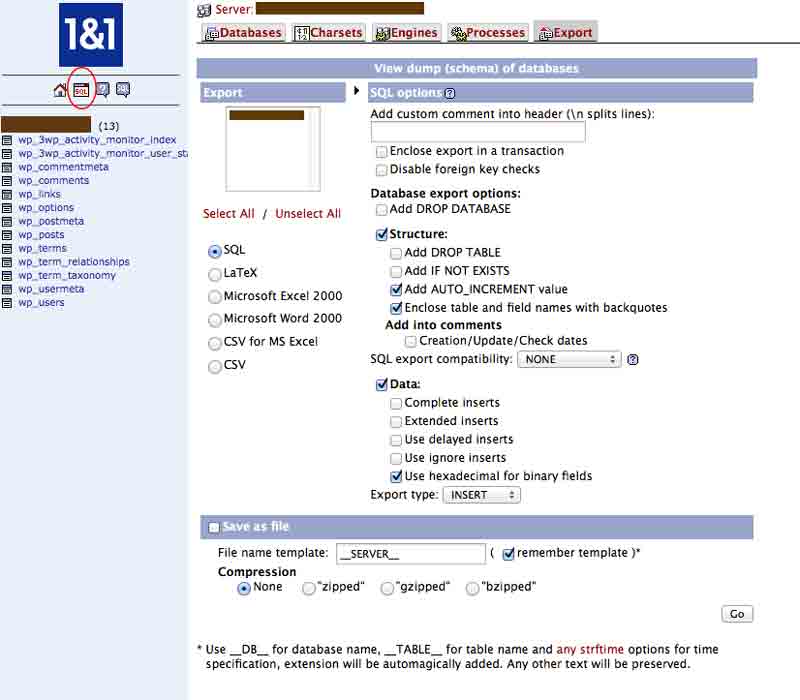
This will open a new query window. You are going to be making an SQL query on your database to change the root directory to where you are moving your newly developed WordPress website.
[/alert]
[alert type=”alert-info” block=”true” close=”false”]
Put this command in the query box:
UPDATE wp_options SET option_value = ‘http://www.stacyduval.com’ WHERE option_name IN (‘siteurl’, ‘home’)
Change ‘http://www.stacyduval.com’ to your new site’s location.
Press go. There will be 2 rows changed. Check to see. It makes you feel good to see that you have actually changed your database. If you see the message ‘0 items changed’ then see if you have made a typo.
 [/alert]
[alert type=”alert-info” block=”true” close=”false”]
If there are posts in your database do this query:
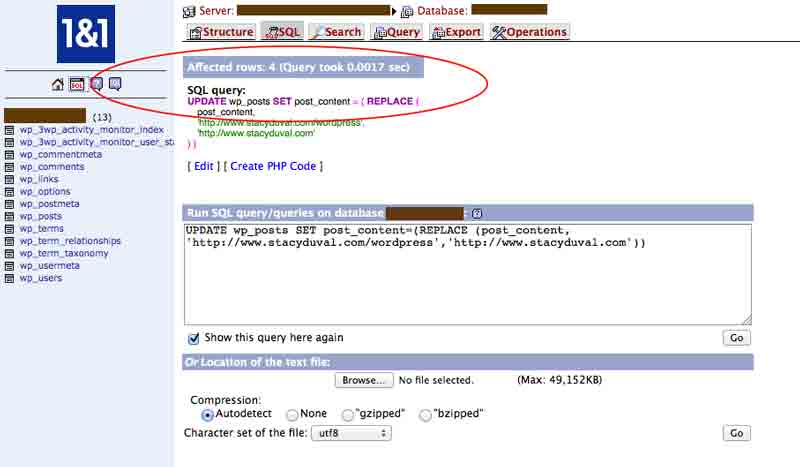
UPDATE wp_posts SET post_content=(REPLACE (post_content, ‘{old url}’,'{new url}’))
Replace {old url} and {new url} with your new and old site urls.
Example: UPDATE wp_posts SET post_content=(REPLACE (post_content, ‘http://www.stacyduval.com/wordpress’,’http://www.stacyduval.com’))
Again check to see how many rows were changed in your database to double check your work.[/alert]
[alert heading=”Step 5 | Update Permalinks” type=”alert-info” block=”true” close=”false”]
Login to the admin panel. Go to Settings and update the permalinks.
[/alert]
[alert heading=”Step 6 | Configure” type=”alert-info” block=”true” close=”false”]
Finally 301 redirect old urls to the new urls in the htaccess file. I put the 301 redirects in the beginning of the htaccess file after the # BEGIN WordPress
For example:
Redirect 301 /summercamp.php http://monicaashleydesigns.com/summer-camp
[/alert]
You are good to go!
Leave a Reply